Wednesday 29 June 2016

Circle of Spring ft Watercolor Wings and Hardwood - You are so kind

Hello to all you amazing stampers!

Today I'm sharing my entry for the Global Design Project Challenge #042! This week we are inspired by a beautiful Teneale Williams sketch!

I only recently purchased the Circle of Spring Photopolymer stamp set to coordinate with the Wonderful Wreath Framelits Dies that I have had a while already! Although an older set, I had to use it for this week's challenge! Also for the very first time I decided to photograph my card lying flat instead of standing upright! I'm not certain which way I prefer? Let me know what works best for you!

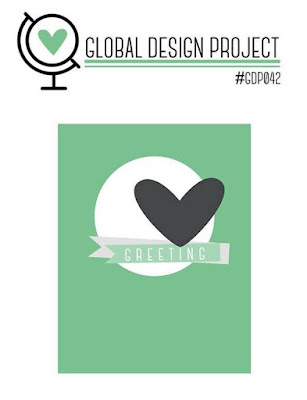
Always the simplest of sketches with a wealth of possibilities...


I wish you could see the Copper embossed Elegant Butterfly in real life!


The Circle of Spring wreath was also heat embossed with the stunning Copper Stampin' Emboss powder.

My Product List


Notes


  • The Circle of Spring stamp was heat embossed onto Shimmery White cardstock. Then I picked up each colour with my Wink of Stella Clear Glitter Brush pen to add to my wreath. Remember to wipe of the tip of your Glitter Pen in between each colour! I loved the fine detail that I could add, while at the same time adding glitter to my colour! I also love to work on Shimmery White cardstock in this way, the cardstock can take some moist but not too much!
  • For the background I partially stamped the Hardwood stamp with Mont Macaron.
  • So simple actually!
Any questions? Please ask away! Or leave a comment! I love hearing from you!

We are off on holiday soon and I will be missing out on the next 2 or 3 weeks of blogging, but I hope to add more value to my blog when I return... starting with taking part in a few more challenges! Let me know what you want to see and I will work on making it possible!

Take care!
Mel xx

Monday 27 June 2016

Love & Affection ft. Rose Wonder - Wishing you a marriage made in heaven...

Hello!

First of all this week I earned this badge... (my second one)

for this card!

Yay! I love the Global Design Project Challenges and it is such a great feeling to be one of the 3 winners amongts so many talented cardmakers! Do yourself a favour and hop on over to the Global Design Project for inspiration! The previous week I was fortunate enough to earn a Special Mention Badge for another card! Yay again!

Today I'm sharing a card featuring a sentiment from the Rose Wonder stamp set and I think it says it all.

Now all I need is a pair of Newly Weds!


(sigh)

My Product List


Notes


  • For the tiny flower bouqet image from the Love & Affection Photopolymer stamp set, I used Stampin' Write Markers (Sweet Sugarplum and Mint Macaron) to colour the stamp. Remember to "huff" over the ink before stamping - this is to moisten the ink again. Does this make any sense?
  • I love using Vellum whenever I want to showcase something, without taking too much away from the background.
With the beautiful Blooms & Bliss Designer Series Paper it was possible to create a quick card by adding only a stamped sentiment!

As always I hope you like it! Comments are always welcome and very much appreciated! If you would like to Pin the image, just click on the image and Pin away!

Take care!
Mel xx


Wednesday 22 June 2016

Cottage Greetings ft Penned & Painted - You are amazing!

Hello!

As always I hope you are doing well! As for me? I am super excited because I will be packing soon for our holiday in South Africa! Not long now and we will get to see our family!

Before I share my entry for this week's Global Design Project #041 challenge...  How lucky am I to have received a special mention for last week's CASE the Designer Challenge #040 entry! You can have a look at last week's entry HERE! Thanks for the badge guys!


This week's challenge is a colour challenge and boy did I struggle! I could not decide on what I wanted to do with this colour combo! 


Beautiful combo!


I loved the soft colour wash of the Night of Navy and Sweet Sugarplum inks.


To add sparkle I used accents of Silver, Basic Rhinestones and the Wink of Stella Clear Glitter Pen.

My Product List


Notes


  • For my background I used a stamp from the Penned & Painted Photpolymer stamp set.
  • I love adding a colour wash to the Shimmery White cardstock! The result is the softest of colours (with a shimmer!). I used an Aqua Painter to add the colour to the Shimmery White cardstock.
  • Because I have owned my Big Shot for quite some time, I had to purchase the new Big Shot Platform (included if you purchase a new Big Shot!) and WOW! it works amazingly! Although I would still recommend using the Precision Base Plate for intricate dies, the new Platform really was worth the money! It cuts through Glimmer paper with ease! Also it is so much easier to use - no tabs!
  • To add dimension to the flower petals I use a Bone Folder to curl the petals.
  •  I used a Circle of Vellum to anchor my pieces.
This card will travel to South Africa with me - as a very special Thank You to a very caring person! Francie your parents will be so proud of you! Thank you couz!

Well that is it from me! I would love to hear from you!
'
Take care! 

Mel xx


Saturday 18 June 2016

Pineapple ft Butterfly Basics - Happy Birthday

Hello!

Finally, after two weeks of missing out,  I am able to take part in my favourite challenge - the Global Design Project challenge #040 - this week we are CASE-ing the designer Shawn de Oliveira!

I loved Shawn's card and was inspired mostly by his sketch and the watercolouring (which I am not good with at at all)! For a while now I wanted to play with the Pineapple background stamp and thought this would be the perfect occasion!


I am so proud of my watercolour background!


Shawn's de Oliveira's beautiful inspiration!


I used Soft Sky ink for the background. I also love that the greeting is placed to the side!

My Product List


Notes


  • I used Sponge Daubers to add ink to my Pineapple Stamp. I love the effect it creates and it feels like I have more control over where the ink goes. I used two orange (Peekaboo Peach and Pumpkin Pie) inks and two green (Emerald Envy and Old Olive) inks for the Pineapple.
  • My Paper Snips worked perfectly to fussy cut around the stamped Pineapple. 
  • For the watercolour background I used a Spritzer to wet the Watercolor Paper, before dropping some ink on to it. Because I am impatient, I used a Heat Tool to rush the drying process. Feel free to add a second layer of ink to your background. I didn't feel the need... I was pretty happy with it as is!
  • The greeting to the side was embossed with Clear Stampin' Emboss Powder and Pacific Point ink.
I love the Tropical feel of my card and didn't even add any embellishments! A first for me!

Let me know what you think! For your convenience I have now added a Pin Button to my images - feel free to Pin away!

Next I hope to use the Pineapple stamp for an actual background! Why not follow me by e-mail? That way you will not miss out on my posts! Just add your e-mail address  to the Follow by Email button to the top right hand of the page!

Thank you for having a look!

Take care!

Mel xx

Thursday 16 June 2016

Number of Years - Look Who's Turning 5

Hello!

It has been two weeks since my last post and I'm sooo happy to be back! The past two weeks have been all about school sport, the school play, birthday cards (one of which I will be sharing in this post)! When you are a Fly-In-Fly-Out mom it can become quite tricky to juggle everything!

I was asked by one of the school mom's to make two  birthday cards to celebrate her little girl's 5th birthday! The sweetest little girl she is! This was one of the cards!


I kicked of with the Number of Years photopolymer stamp set... a no brainer really! This set coordinates with the Large Number Framelits Dies (see p136 of Stampin' Up!'s Annual Catalogue)!


To make it easier for myself I used my favourite background - stripes!

My Product List


Notes


  • To add more texture to my striped background, I heat embossed each stripe with Clear Stampin' Emboss Powder! I chose the stripe stamp from the Work of Art stamp set, because it was the perfect length for this layer.
  • To Make the no 5 pop even more a layered it on top of Vellum! 
  • I can strongly recommend fun foam to add dimension to smaller die cuts (like with the number framelits) This also make the embellishment last better through the mailing process. Thinlits cuts through fun foam quite easily when using the Precision Base Plate.
  • For my Flirty Flamingo card base I inked around the edges of Whisper White Thick cardstock with my Flirty Flamingo ink pad, waited for it to dry and then added VersaMark ink and Iridescent Ice Stampin' Emboss powder to add sparkle. Please note that the Iridescent Ice Stampin' Emboss powder is a retired product.
Easy card! High impact I think! Was it good enough for a 5 year old? I will never know!

Please come back for the post of my second card!  Join my mailing list - that way you will never miss a new post!

As always I love to read your comments!

Take care!

Mel xx

Tuesday 7 June 2016

Cards, Coffee and Cake Morning - 22 June 2016, Jindalee, Western Australia

Hello!

To all that find themselves living in my area (Jindalee, Western Australia, 6036) you are invited! I am planning a get together on the 22nd of June 2016, from 9;30 am. Her's the deal! You purchase the Beautiful Designer Tin of Cards (orders need to be finalised by Friday, the 10th of June 2016 via my e-mail). You supply your own Tin of Cards (p 160 of Stampin'Up!'s New Annual Catalogue) and I supply all the additional products you need to complete the cards! Yes I will bring the coordinating Designer Tin of Cards Photopolymer stamp set, ink adhesives, etc! And great company! Remember you only have to purchase the Tin of Cards (makes 16 cards, 4 each of 4 designs)!

Click on the images for a closer look


Don't wait Place your order with me today! I promise it will be a fun morning!

Thanks for supporting my Stampin' Up! business!

Take care!

Mel xx


Monday 6 June 2016

Thoughtful Banners - Oh, Happy Day

Hello!

Lucky for me we are enjoying a long weekend here in Western Australia (Monday being WA Day - short for Western Australia Day)! One amazing day of crafting ahead!! My laundry baskets are more or less empty, the house has been vacuumed and a very high chance of rain!! I love it when a plan comes together! Also letting my fellow stampers over East know that I am thinking of them with all the flooding going on. Stay inside, stay safe!

Today I'm sharing the beautiful Playful Palette Designer Series Paper Stack and a few of the new In-colors! This stack ( 6" x 6" in size) includes 48 double sided patterned paper - as always of the highest quality. You can find it on p. 174 of Stampin' Up!'s New Annual Catalogue.


I loved putting this card together! So many new things to play with in the new catalogue!


And then there was the Swirly Scribbles Thinlits...
 and the Sunburst Thinlits AND the Botanical Builder Framelits!

My Product List


Notes

  • The Playful Palette Paper Stack is so full of pattern that I didn't know where to start! The background colour for the stack is Very Vanilla that goes perfectly with all the new In-colors.
  • I used Dimensionals to pop up the Sunburst Thinlits die. 
  • The circle thinlits from the Swirly Scribbles Thinlits  frames the center of the Sunburst beautifully, while at the same time adding glimmer.
  • The Thoughtful Banner Photopolymer stamp set (with the coordinating Duet Banner punch) is definitely a set that will take you far. Remember you save 10% on each product when you bundle and save!
Well, I will catch up with you soon!

Take care!

Mel xx


Saturday 4 June 2016

Pun Intended - Snappy Birthday

Hello again!

I hope you have by now, had the time to page through Stampin'Up!'s brand NEW Annual Catalogue! It has to be the most amazing one yet! I know I always say that, but those designers always manage to stay on trend!

Today I am sharing another ( last one!) make & take that was on offer at my catalogue launch party! You might want to have a look at no 1 and no 2.

I had so much fun preparing for my Launch Party and want to make use of this opportunity to invite you to join my Stampin' Up! team  (only me at the moment). I get so much out of it! And I'm certain you would too! I promise to bring hard work, great customer service and creativity to the table!

The totally girly Pop of Pink Designer Series Paper and the camera image from the Pun Intended Photopolymer stamp set (only available with Stampin' Rewards) are a match made in heaven!


I love all camera images!


A rhinestone adds sparkle to the lense!

My Product list


I totally enjoyed making this card! Because it was a make & take for ladies relatively new to rubber stamping, I kept it quite simple! Let me know how I could step it up! As always I value your comments!

Take care!

Mel xx


Friday 3 June 2016

Love & Affection - sending a smile your way

Hello!

Today I'm sharing the second make & take that was part of my Stampin'Up!  New Annual Catalogue launch on the 1st of June! I tried to keep it simple, because most of the ladies were relatively new to stamping! My first make & take you can see HERE!

This time I focused on the beautiful Affectionately Yours Suite (p. 44 in the New Annual Catalogue). The Affectionately Yours Speciality Designer Paper features this season's hottest trend - Copper!


I am smitten with the cursive  font used for the greetings in the Love & Affection Photopolymer stamp set. It is perfect!


One of the Floral Affection Textured Impression Folders (there are 2) frames the lovely greeting.


My Product List


Notes

  • There is a new Big Shot Platform (p. 190 of the Annual Catalogue) available for purchase seperately if you already have a Big Shot. If, however, you are buying a Big Shot for the first time, the new platform is already included with 2 cutting pads. The new platform is very easy to work with as it doesn't have different tabs  - only an adapter for thin dies. 
  • The Precision Base Plate is still the one to use for dies with fine details.
If you still don't have the New Annual Catalogue in your hands, contact me! 

Take care!

Mel xx

Thursday 2 June 2016

Pop of Paradise ft Thoughtful Banners - Celebrate (The Launch of the New Catalogue!)

Hello!

First things first! Stampin'Up!'s New Annual Catalogue is LIVE! Click on the image to the right to page through it! Or better yet contact me  for a copy if you live in Western Australia! Second things second... I have just opened an online Workshop Order with June's hostess code TSGB2NJ2

I had a really successful launch party and I will share with you, during the next couple of days all the Make & Takes that were available at my launch! I kept it quite simple, because the aim of my launch was "happy stampers"! Accept for one attendee (the wonderful Julie) most of the ladies were relatively new to cardmaking.

The first project I'm sharing is this little note pad! How adorable is the "Pink Shrimp Eater" as my 8 year old daughter calls them!


This pretty Flamingo is from the Pop Of Paradise Stamp set!


I used Stampin' Markers for the Flamingo! Flirty Flamingo and Basic Black.


The bright Pink feather was taken of a huge Pink costume boa.

My Product List


Hints & Things


  • I found the best way to colour the Flamingo was to use Stampin' Write Markers. I used the new In Colour, Flirty Flamingo and Basic Black.
  • I simply fell in love with the Thoughtful Banners Photopolymer Stamp set - so many possibilities! And to think there is the coordinating Duet Banner Punch to go with it!

As always all comments (and orders) are very much appreciated! The more you order (with the hostess code), the more I can spoil you with a surprise gift at the end of June!!! Please remember to check that you are using my Online Shop !


Take care!

Mel xx